> ## Documentation Index
> Fetch the complete documentation index at: https://vrchat-docs.moverse.ai/llms.txt
> Use this file to discover all available pages before exploring further.
# Calibration
Proper calibration is essential for accurate results in Moverse Studio. This process involves two main steps: first, aligning the cameras spatially, and second, defining the coordinate system's ground plane.
### Step 1: Camera Spatial Alignment
#### 1.1 Check Streaming
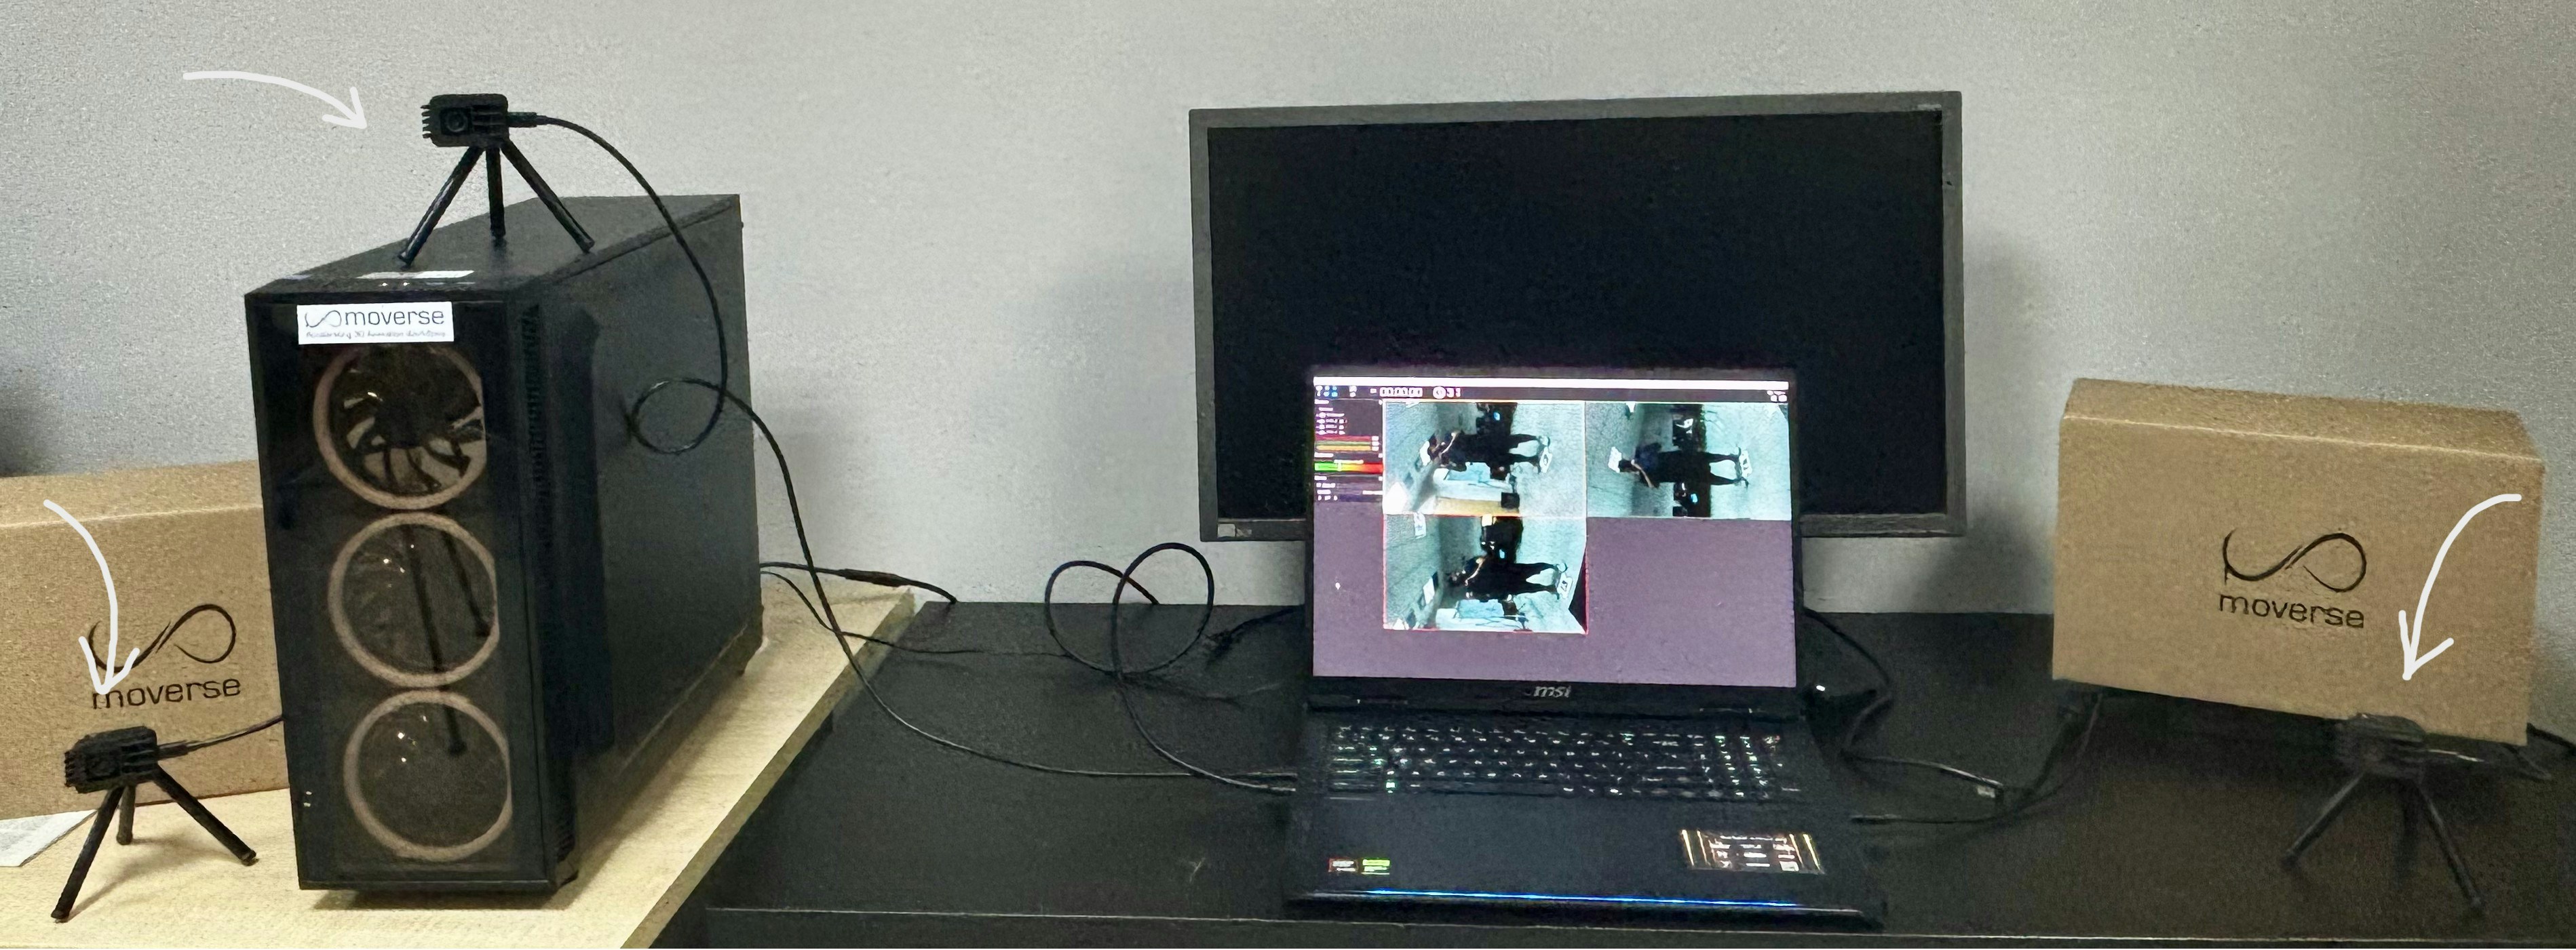
Ensure all cameras are actively streaming and that their video feeds are visible.
#### 1.2 Adjust Camera Placement
To check the placement, have someone move around the capture space.
Optimal placement is achieved when the subject is clearly and simultaneously visible from all camera angles.
For best results, ensure all cameras can see the user's **full body in T-Pose**.
#### 1.3 Start Multi-camera Calibration
Click the camera calibration icon located on the top toolbar of the studio interface.
#### 1.4 Enter Capturing Space with Calibration Accessories
Enter the capturing space with the provided calibration board.
#### 1.5 Monitor Calibration Progress
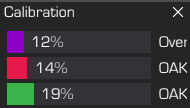
Watch the calibration progress bars for each camera. The bars will fill up as the system gathers calibration data.
#### 1.6 Complete Calibration
Calibration is complete once all bars reach 100%.
#### 1.7 Evaluate Calibration Quality
After calibration finishes, review the precision.
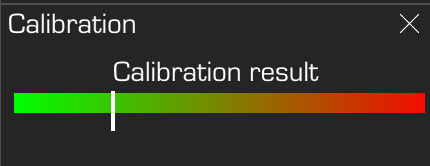
A quality bar will display the overall result.
The closer the indicator is to the green side, the better the calibration.
If you are not satisfied with the quality, please repeat the process.
{/* - Decide whether to accept the calibration based on the indicated quality. If the quality is insufficient, adjustments may be needed to improve the calibration. */}
### Step 2: Setting the Coordinate System Origin
#### 2.1 Place Calibration Accessory
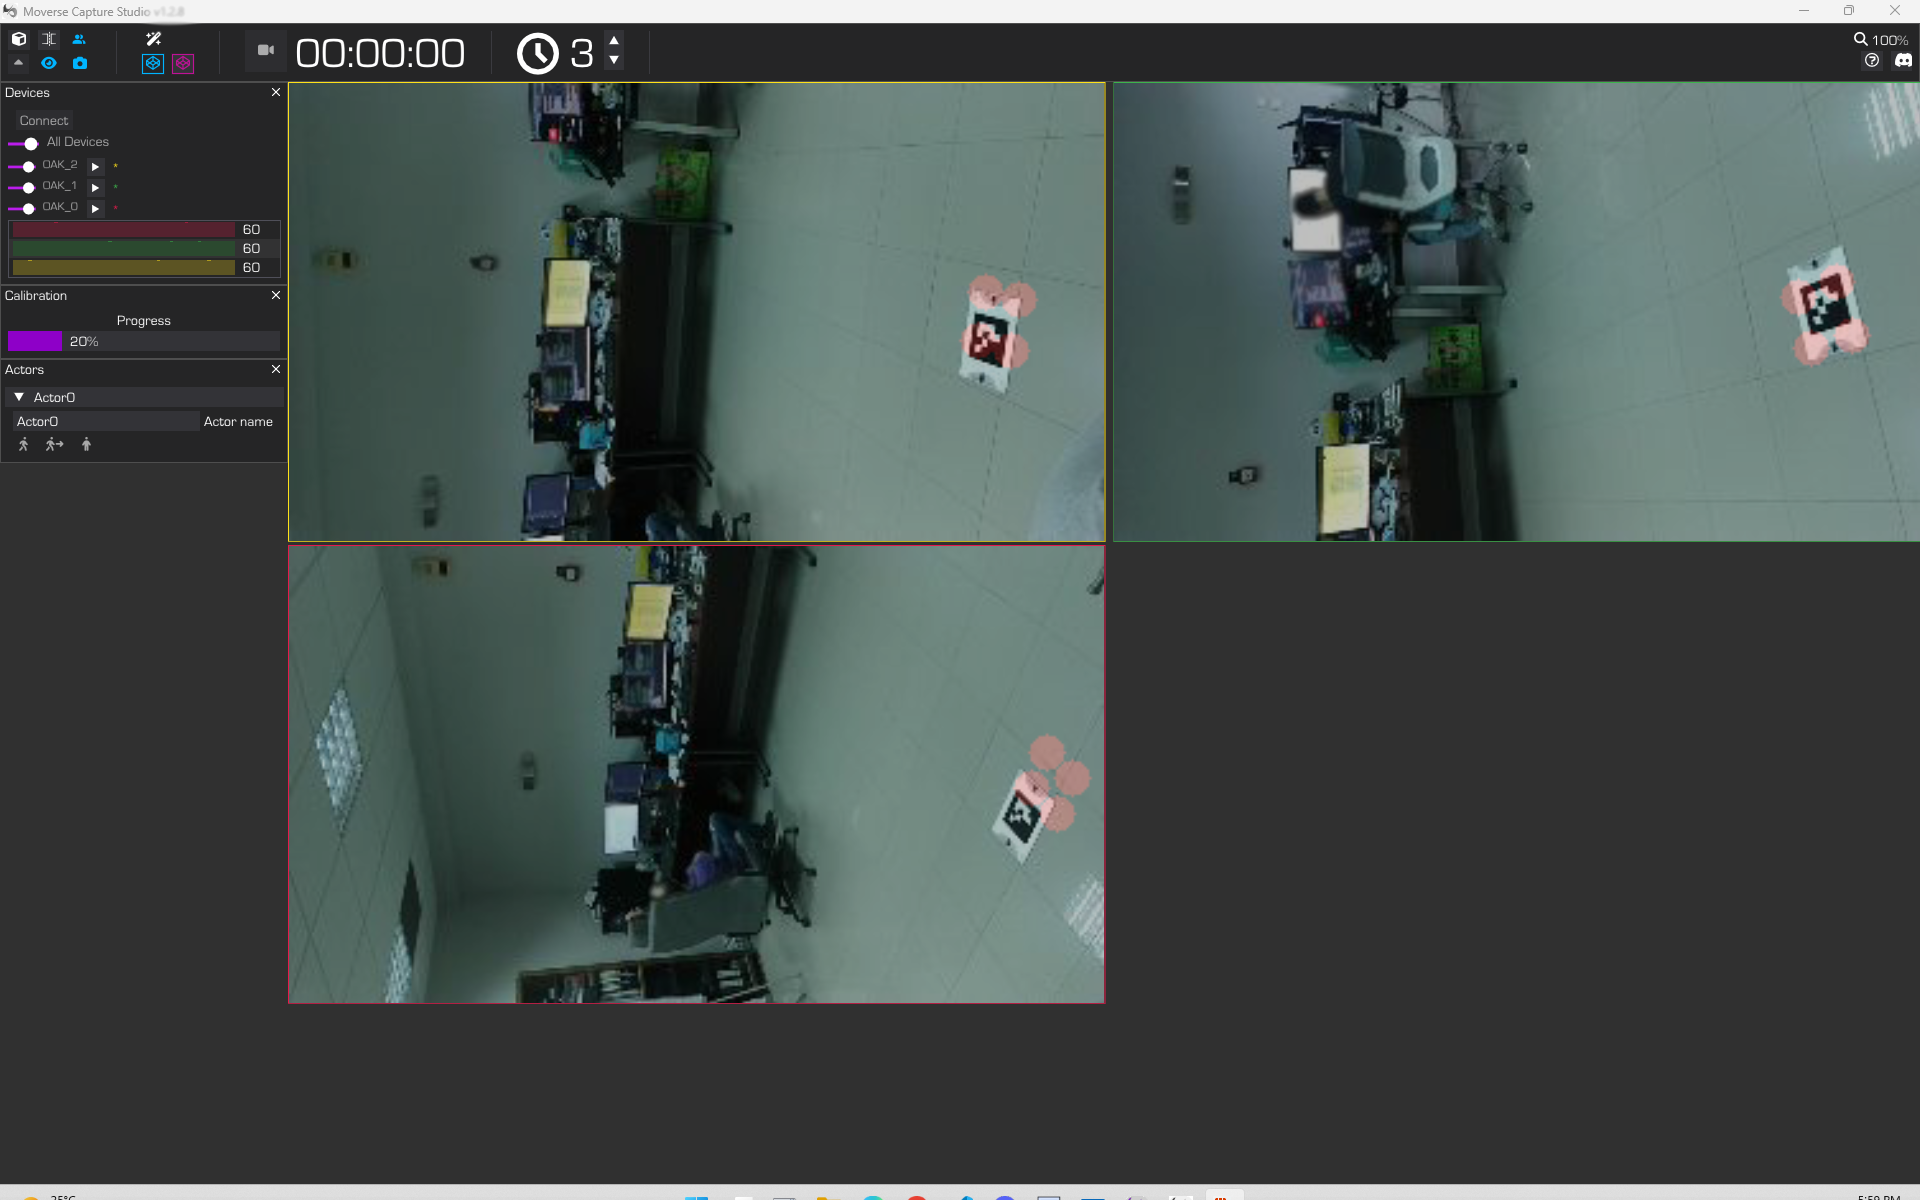
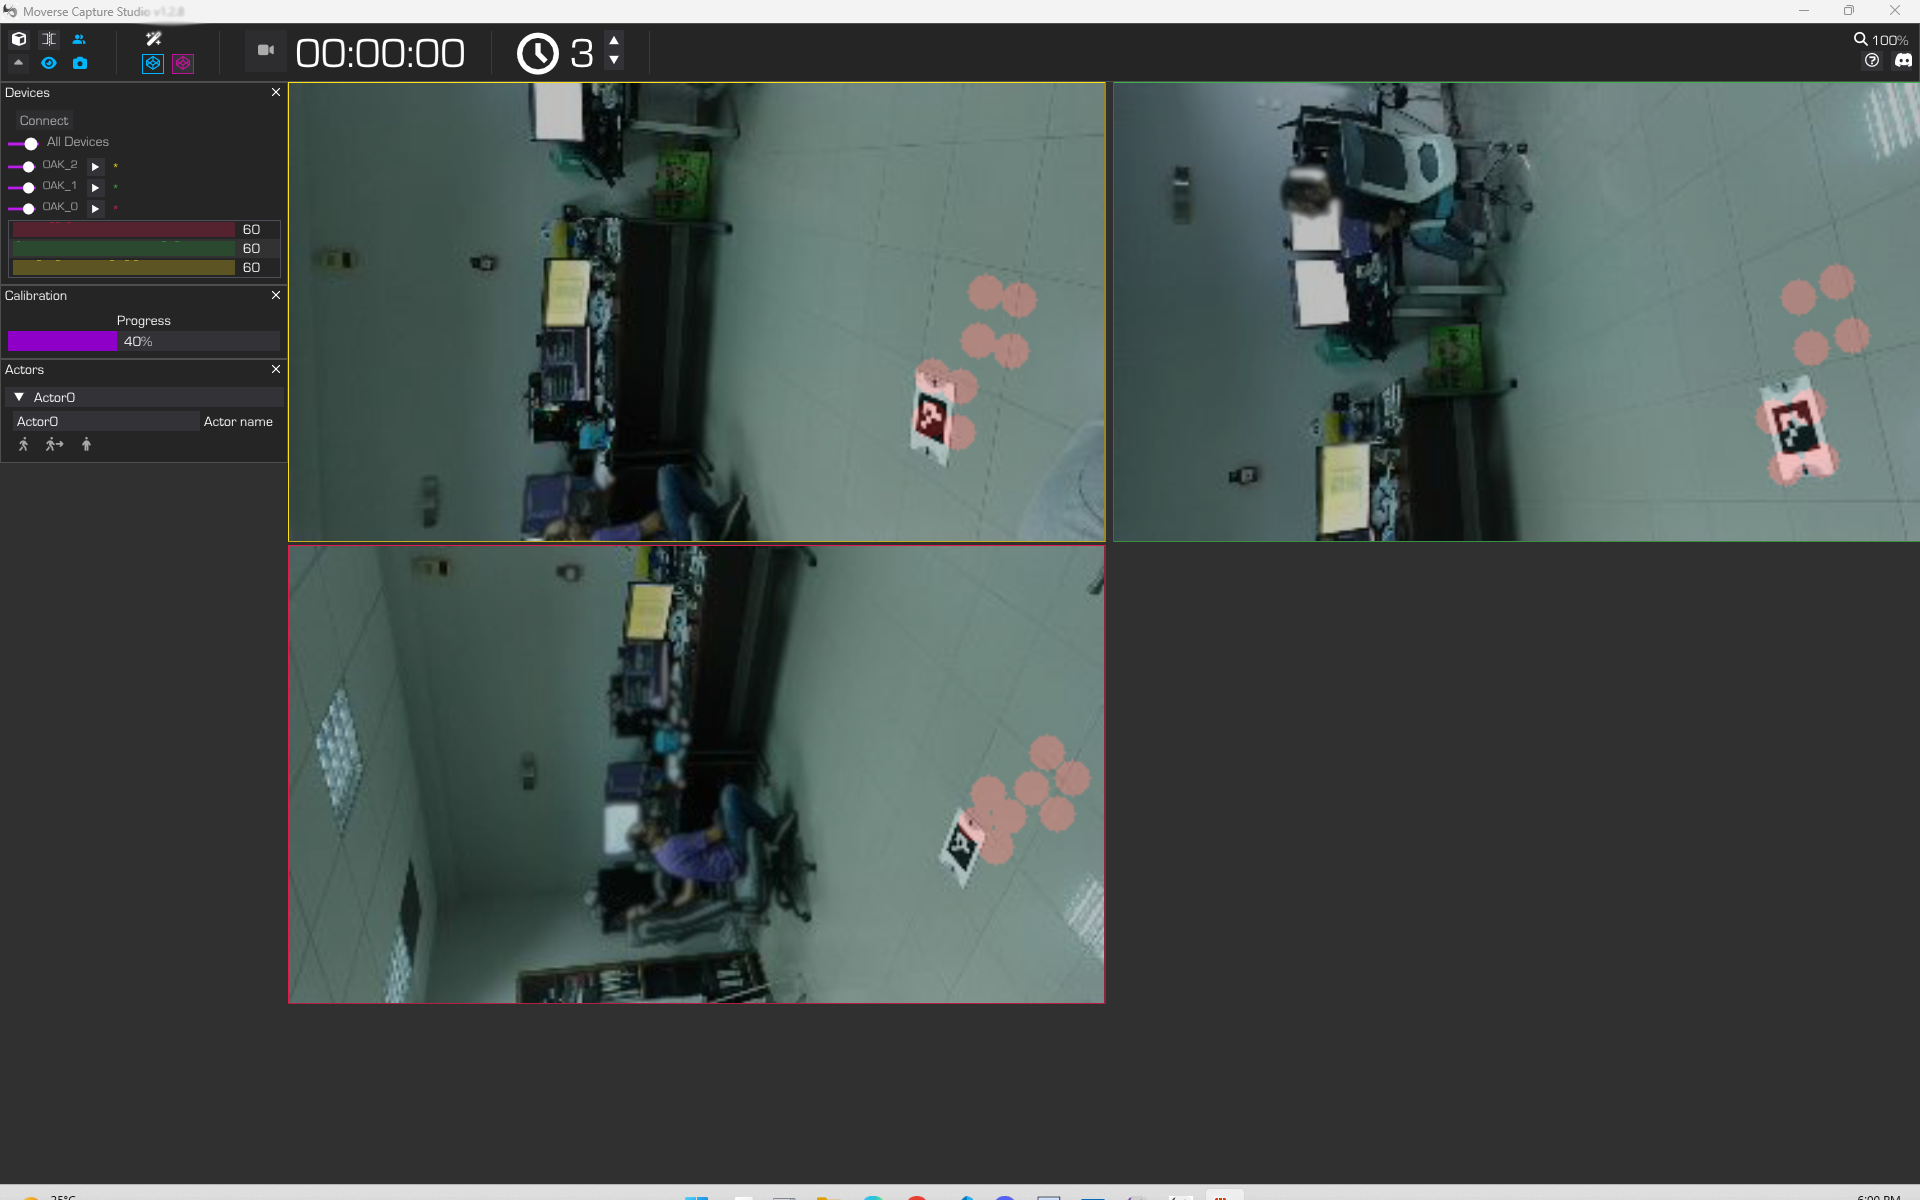
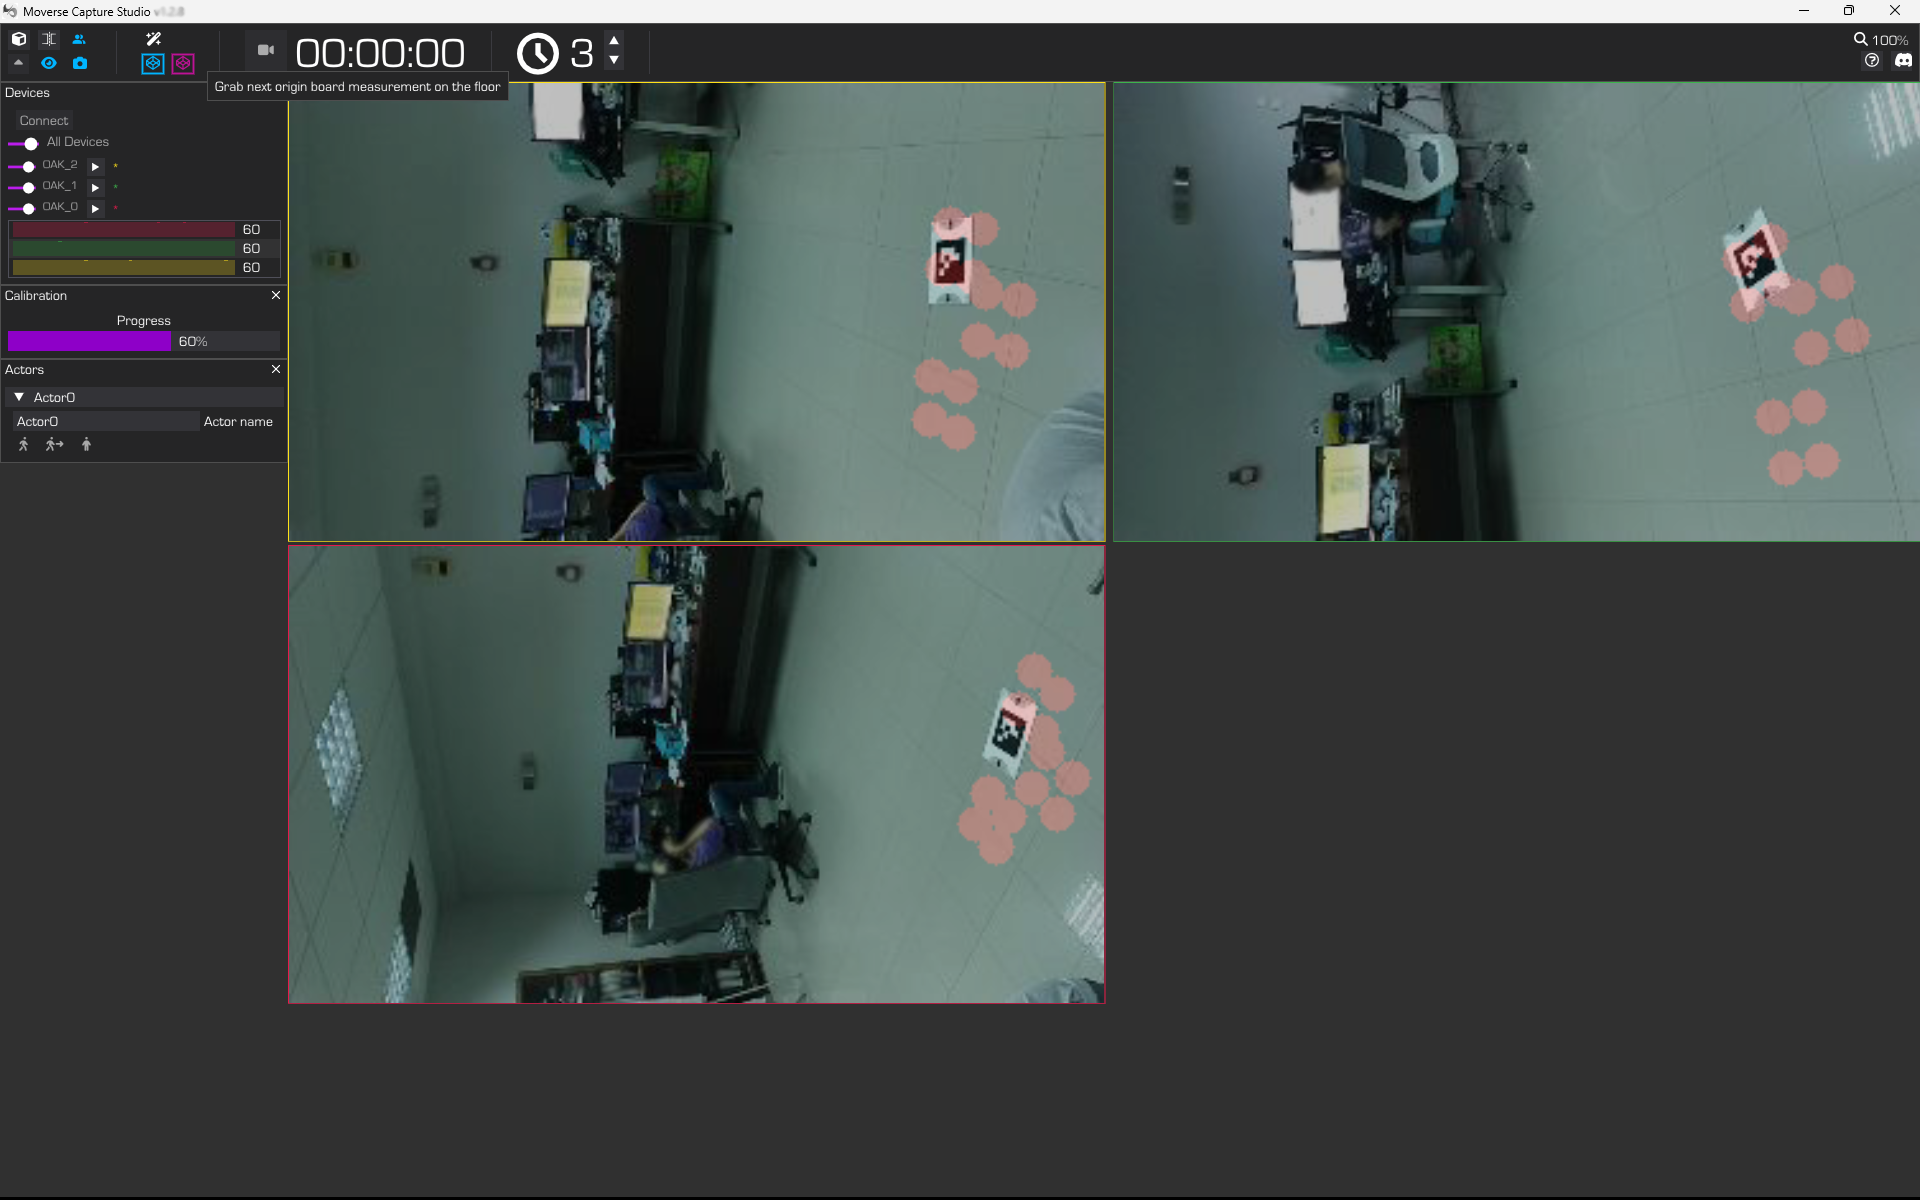
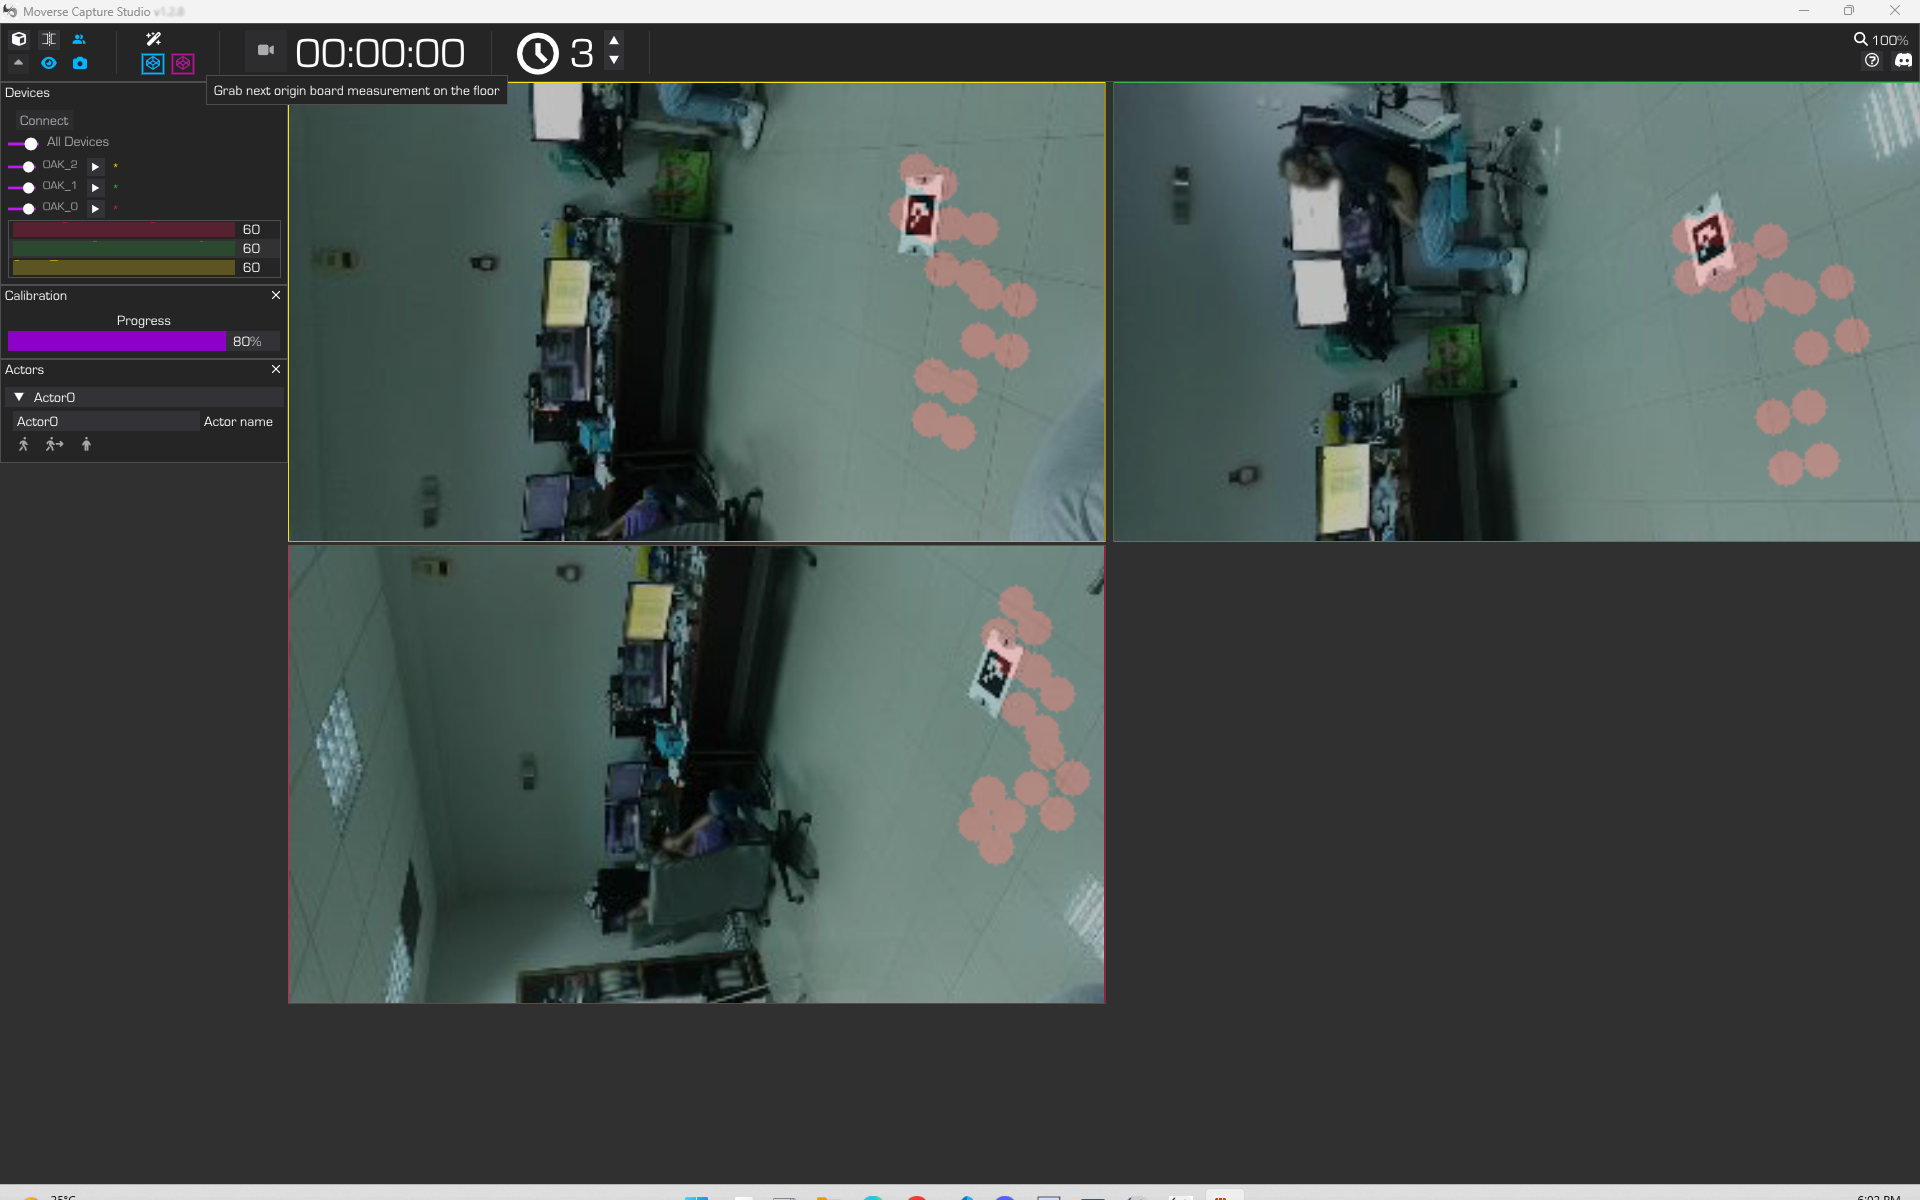
Place the calibration board flat on the floor. You will need to take 5 measurements (until the progress bar reaches 100%). To take a measurement, press the purple origin button that appears next to the icon when origin calibration begins. See the step-by-step visual example below for reference.
Step 1
Step 2
Step 3
Step 4
#### 2.2 Origin Calibration Completion
Once the progress bar disappears, the ground plane and coordinate system are successfully set.
#### Summary
The entire calibration process described above is shown in the following video:
Once both steps are complete, your system is fully calibrated and ready for body capture.
 #### 1.6 Complete Calibration
Calibration is complete once all bars reach 100%.
#### 1.7 Evaluate Calibration Quality
After calibration finishes, review the precision.
A quality bar will display the overall result.
The closer the indicator is to the green side, the better the calibration.
If you are not satisfied with the quality, please repeat the process.
#### 1.6 Complete Calibration
Calibration is complete once all bars reach 100%.
#### 1.7 Evaluate Calibration Quality
After calibration finishes, review the precision.
A quality bar will display the overall result.
The closer the indicator is to the green side, the better the calibration.
If you are not satisfied with the quality, please repeat the process.
 {/* - Decide whether to accept the calibration based on the indicated quality. If the quality is insufficient, adjustments may be needed to improve the calibration. */}
### Step 2: Setting the Coordinate System Origin
#### 2.1 Place Calibration Accessory
Place the calibration board flat on the floor. You will need to take 5 measurements (until the progress bar reaches 100%). To take a measurement, press the purple origin button that appears next to the
{/* - Decide whether to accept the calibration based on the indicated quality. If the quality is insufficient, adjustments may be needed to improve the calibration. */}
### Step 2: Setting the Coordinate System Origin
#### 2.1 Place Calibration Accessory
Place the calibration board flat on the floor. You will need to take 5 measurements (until the progress bar reaches 100%). To take a measurement, press the purple origin button that appears next to the