Step 1: Login to Moverse Hub
Login with your account credentials to access your workspace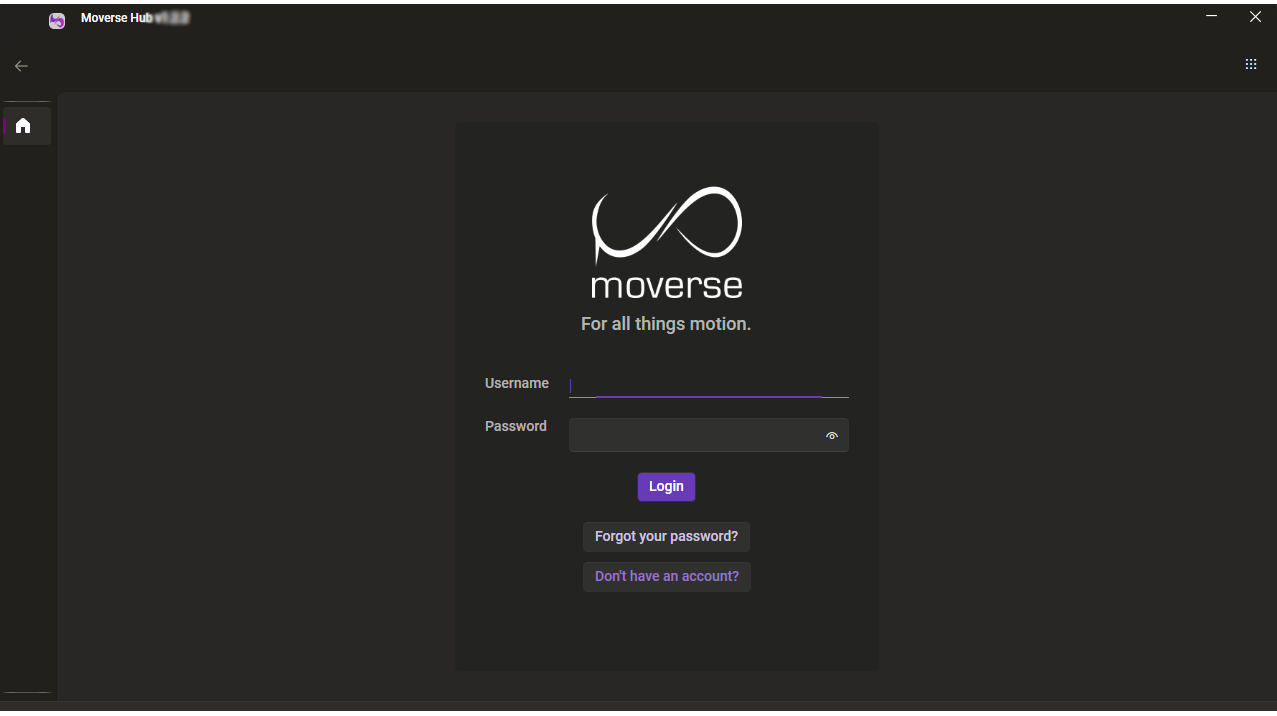
🧠
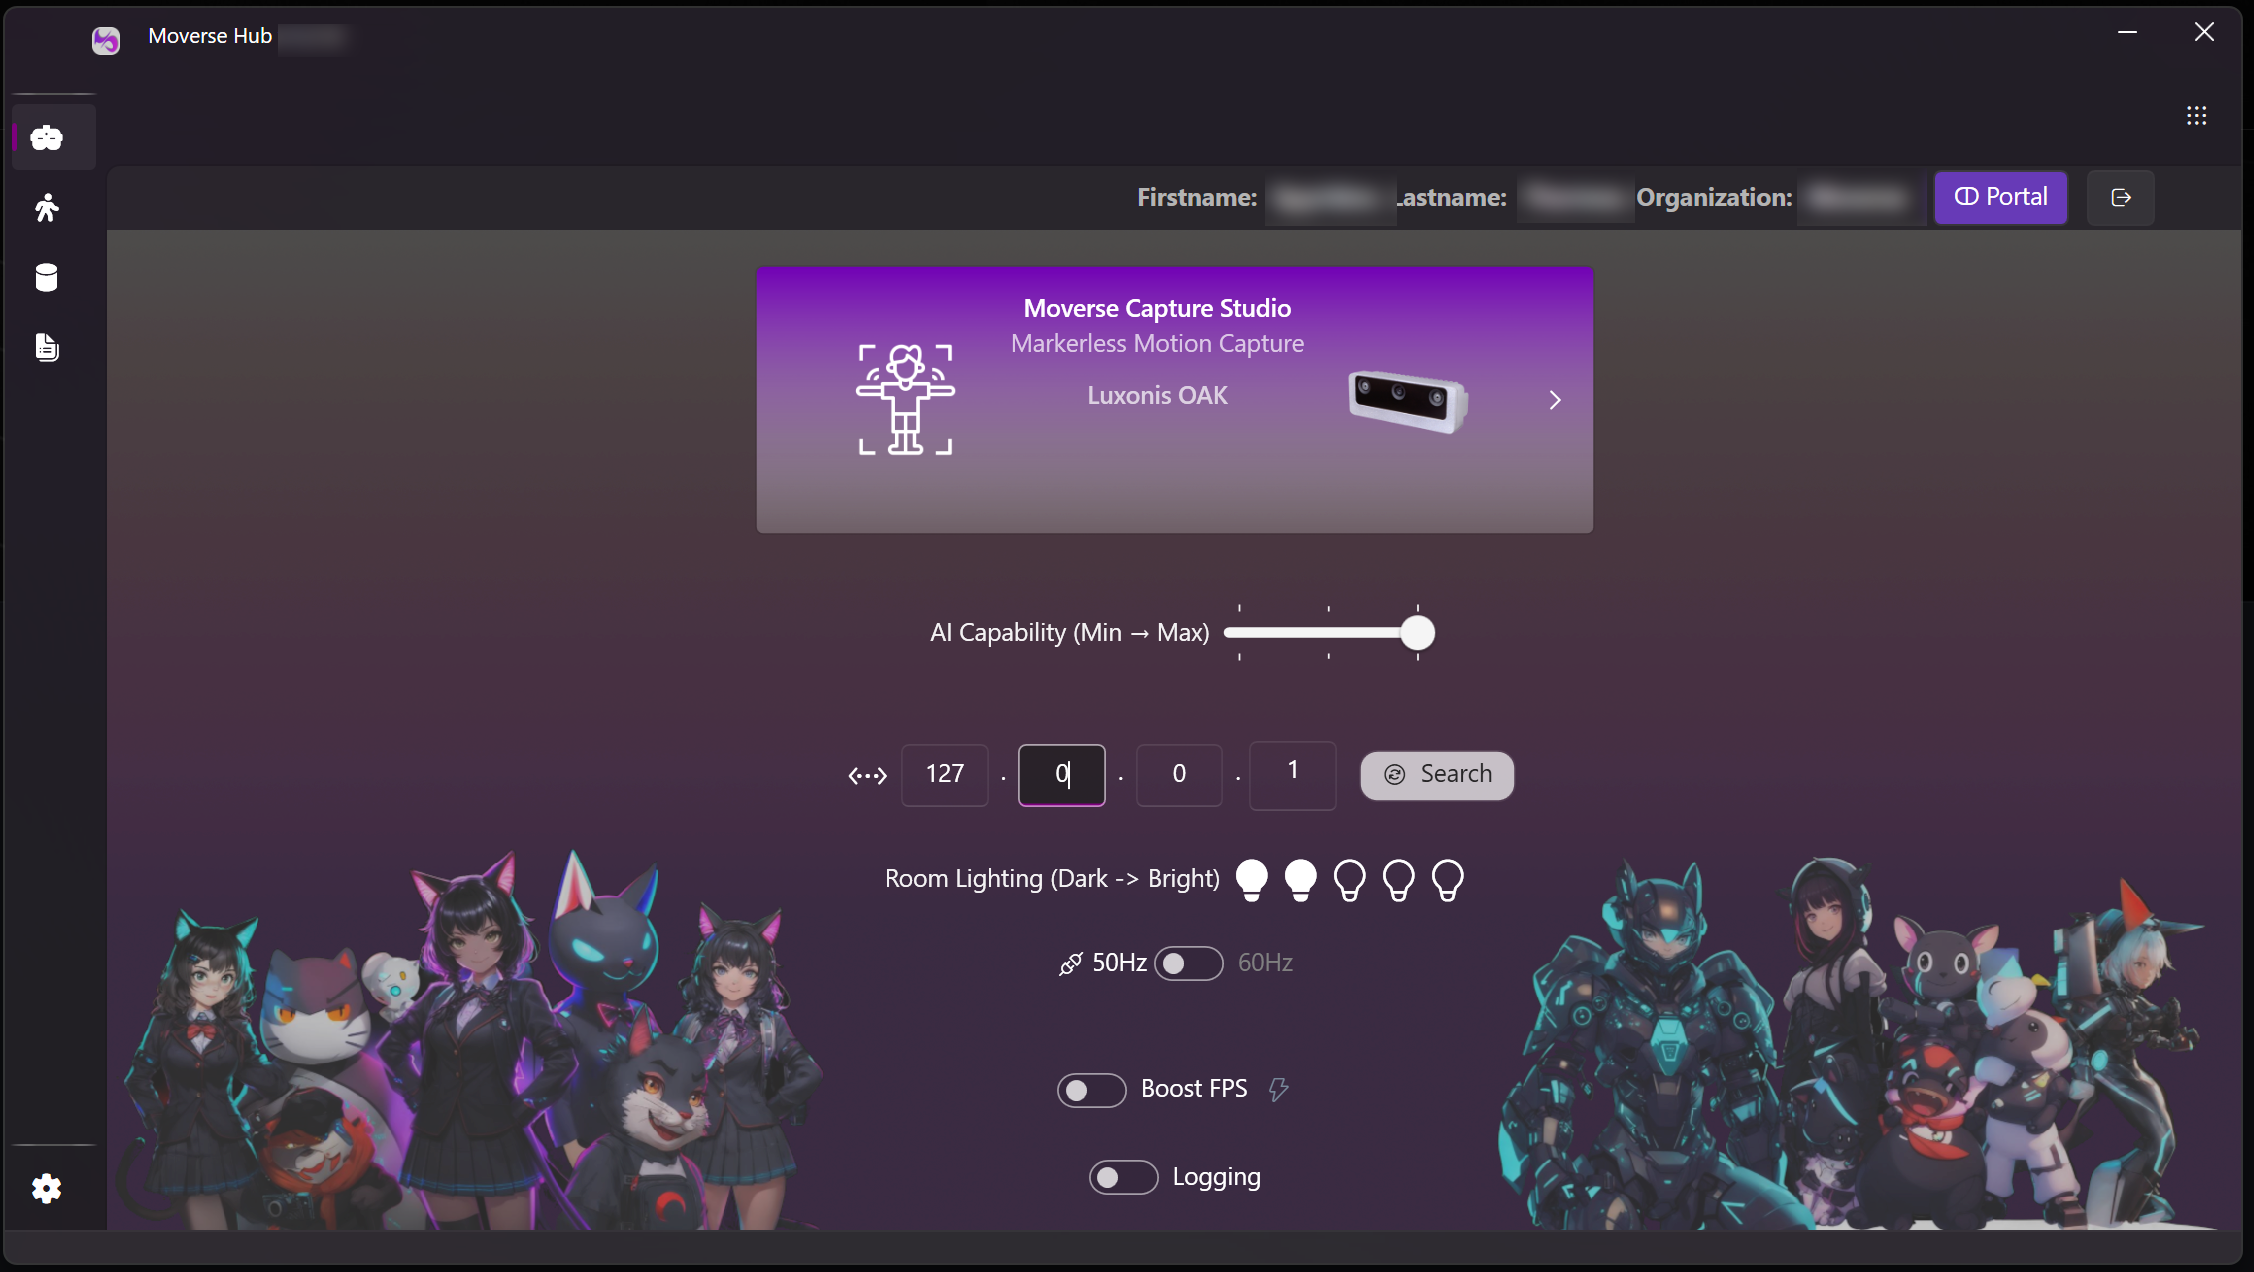
AI-capability: Moverse Capture supports 3 AI levels that cover low | mid | high tiers of GPUs. AI level 1 is the default but you can try improving the capture results based on your hardware capabilities.
🌐
IP: This is the local IP assigned to your VR headset and where VRCHAT FBT is listening. If you don’t know the IP just start the VRCHAT application in the VR headset and click the “Search” button in the Launcher. This will automatically retrieve the correct local IP for you.
💡
Room Lighting: This affects the gain camara parameter and ensures a smooth motion capture performance in different lighting conditions. If you feel that you have a darker room, change this to level 1 or if you feel your room is very bright, consider increasing the lighting parameter to levels 3-5.
⚡
Boost FPS: This affects the frame rate of the cameras. If you own a PC quite above the system required specs, by selecting Boost FPS the cameras capture at 85 FPS for faster and smoother experience. In case your PC struggles with this option, it is recommended to disable it, i.e. operate at 60 FPS.
📊
Turn on Logging: Enable verbose logging to help the Moverse Support team diagnose and resolve issues more efficiently
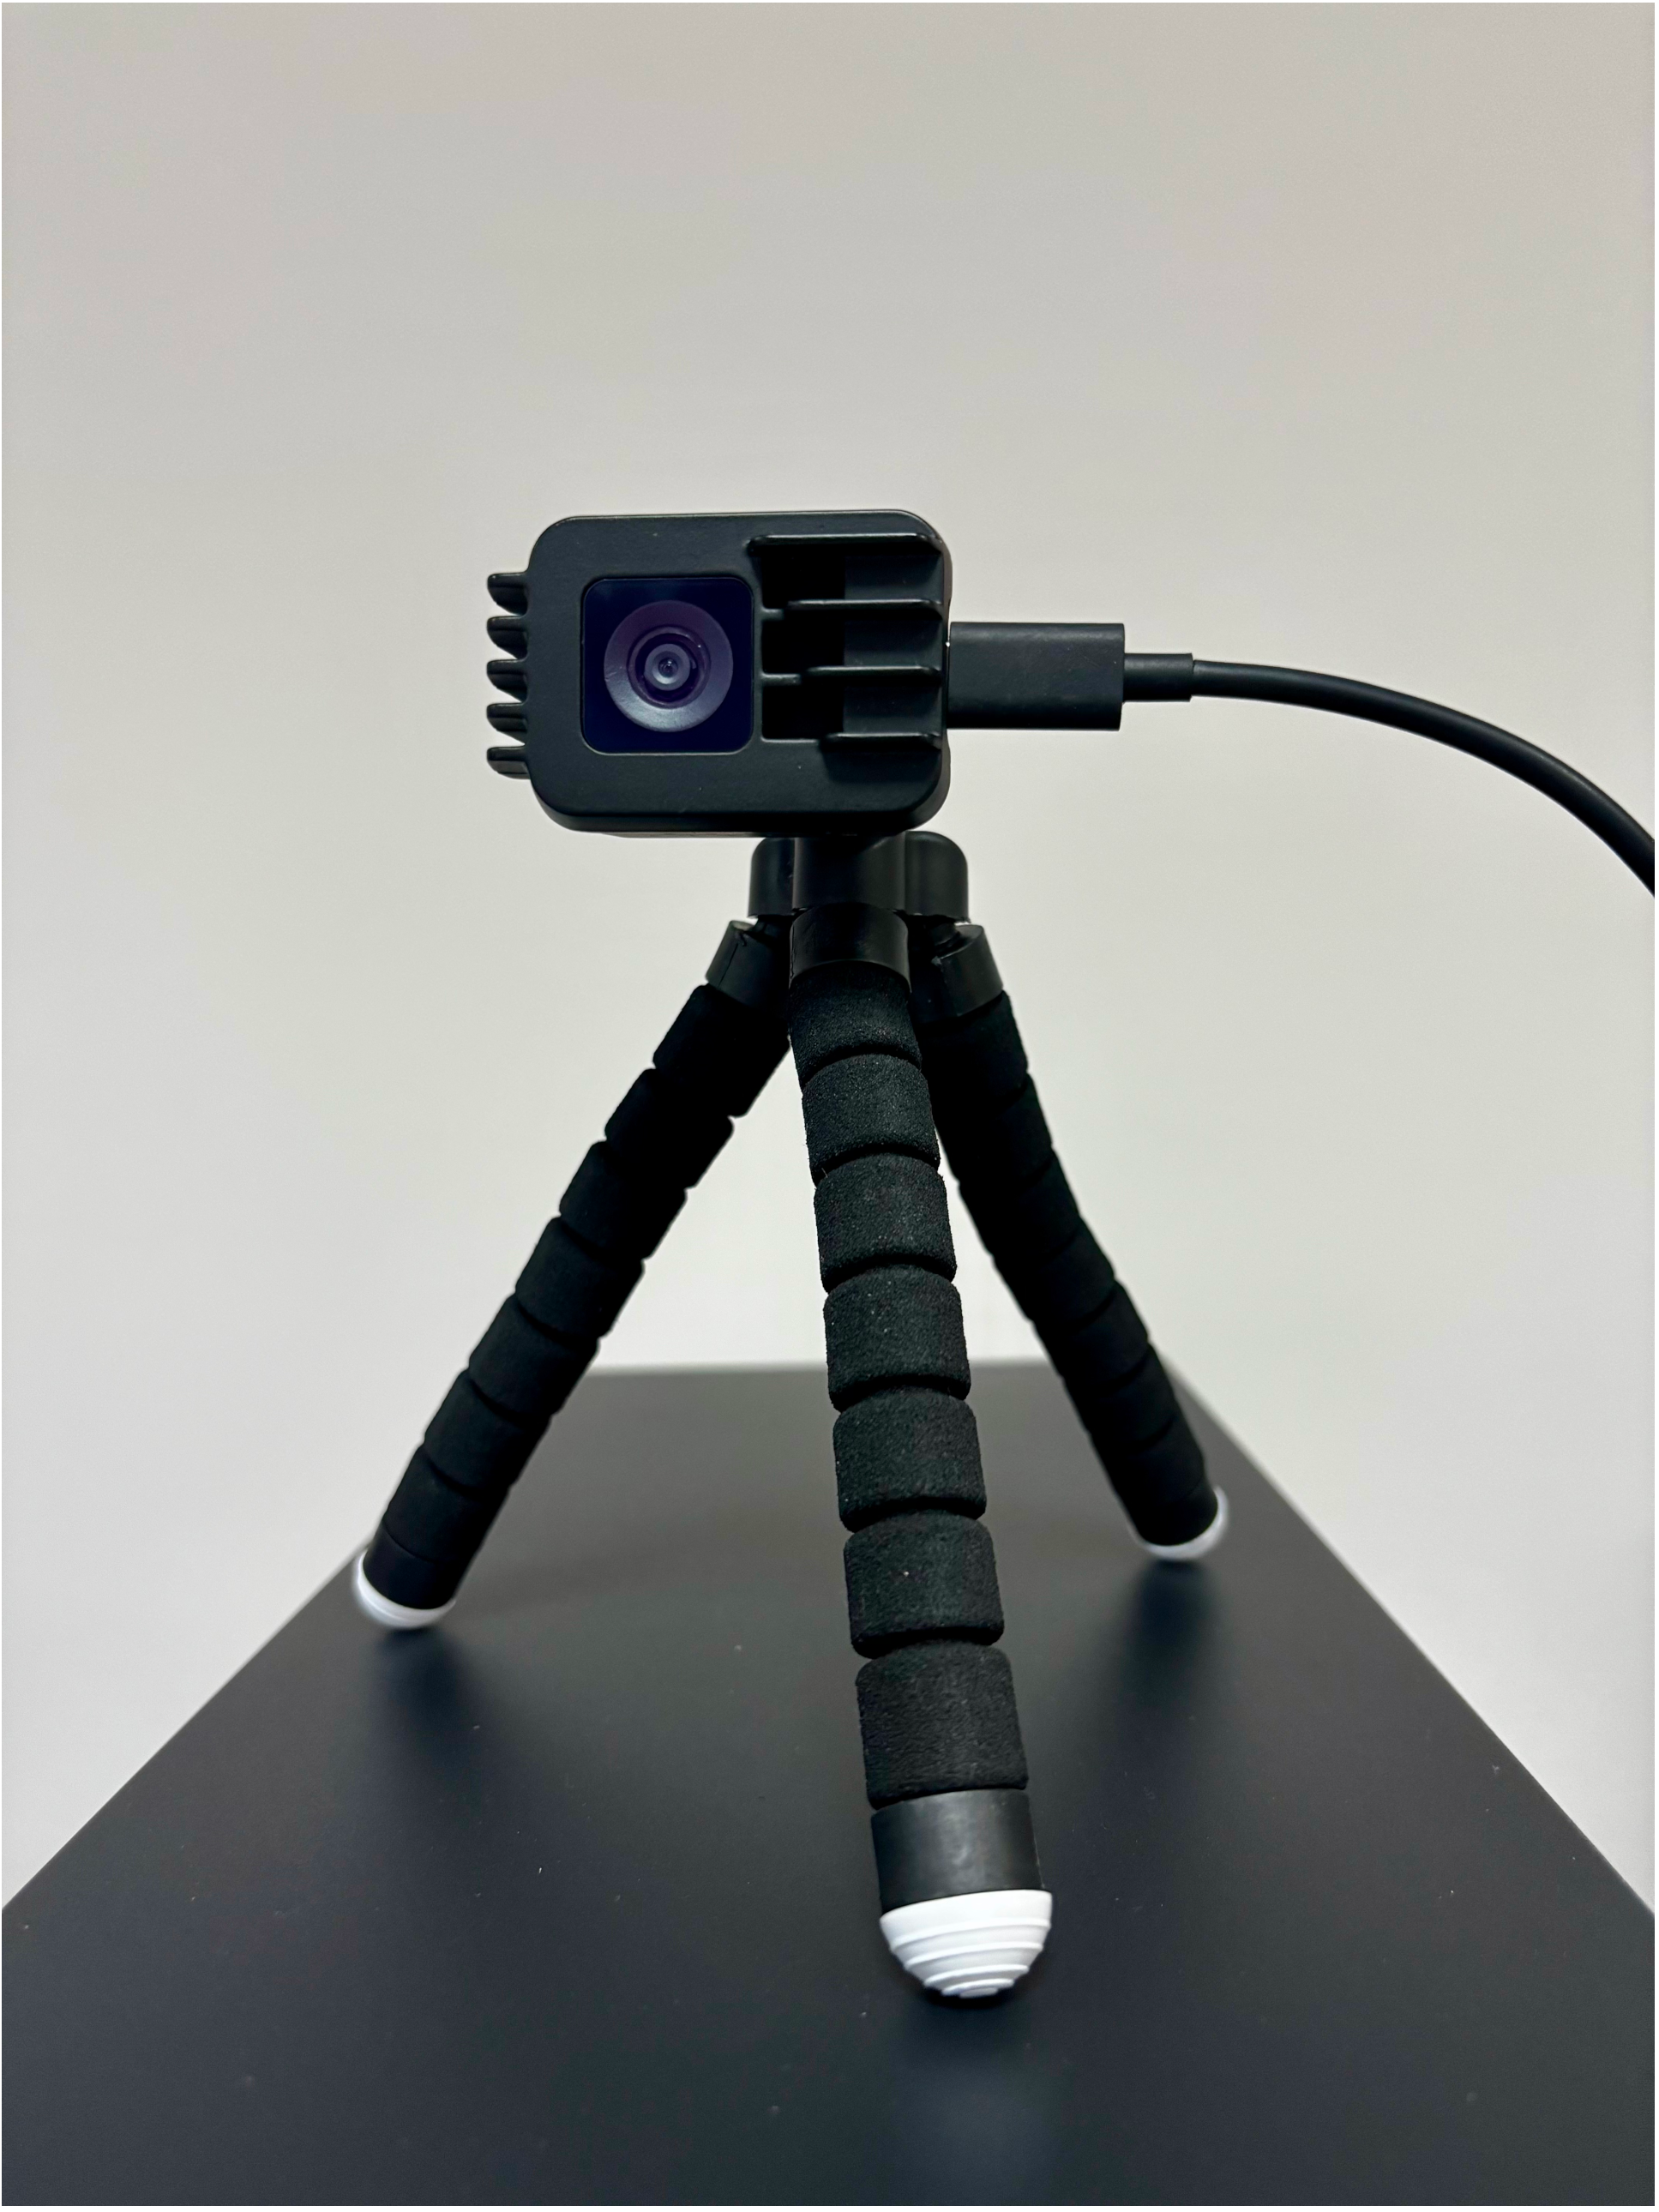
Step 2: Camera Placement
Official URL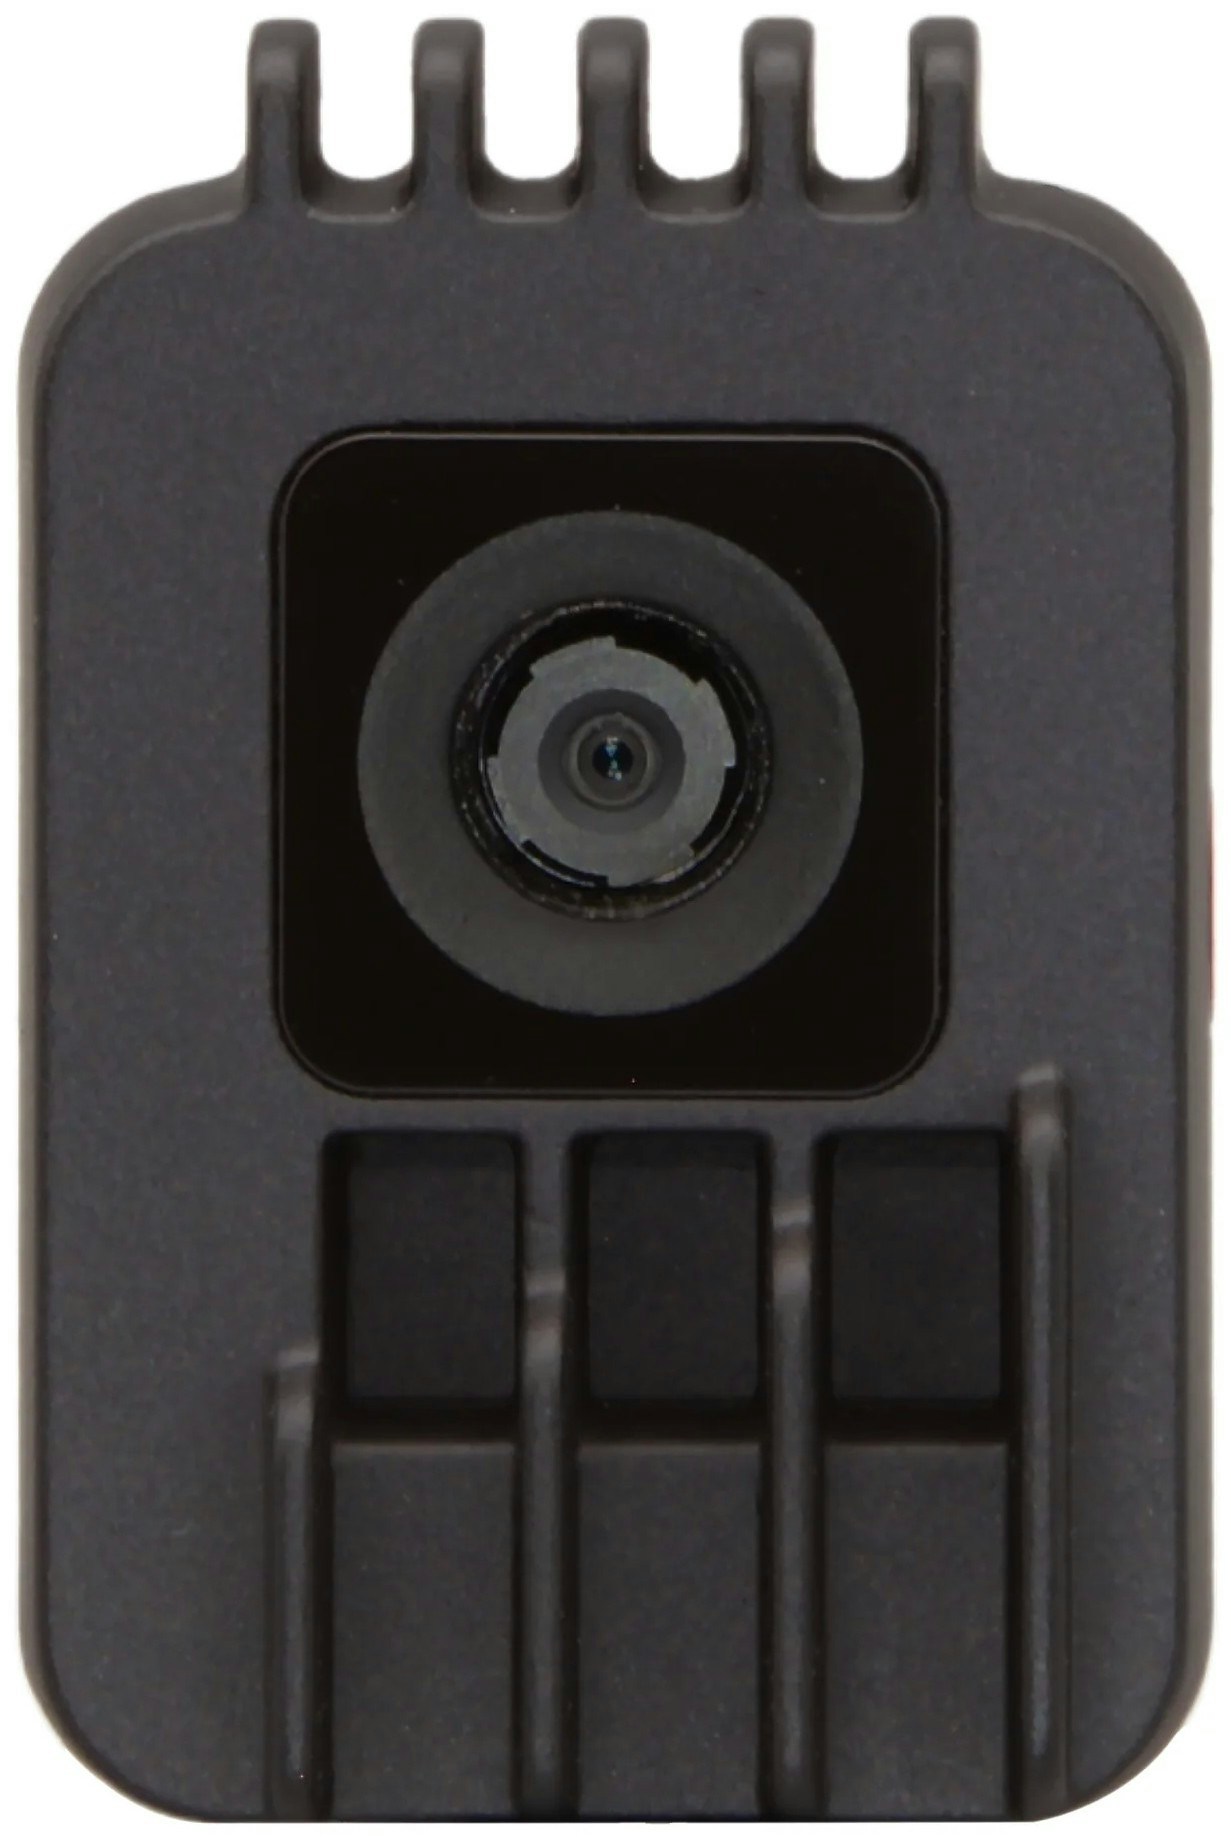
- Setup Area: It is recommended to use a 2m by 2m free space for the camera setup. Arrange the 3 cameras in an arc-like shape, all looking towards the center of the capturing space. Make sure that the left- and right-most cameras are placed with at least 70° angle with respect to the user. This arrangement optimizes the coverage and quality of the capturing process.
- Placement Details: Details regarding the recommended camera placement are depicted in the figure below. However, it is important to mention that the setup can and should be adapted based on the user’s space.
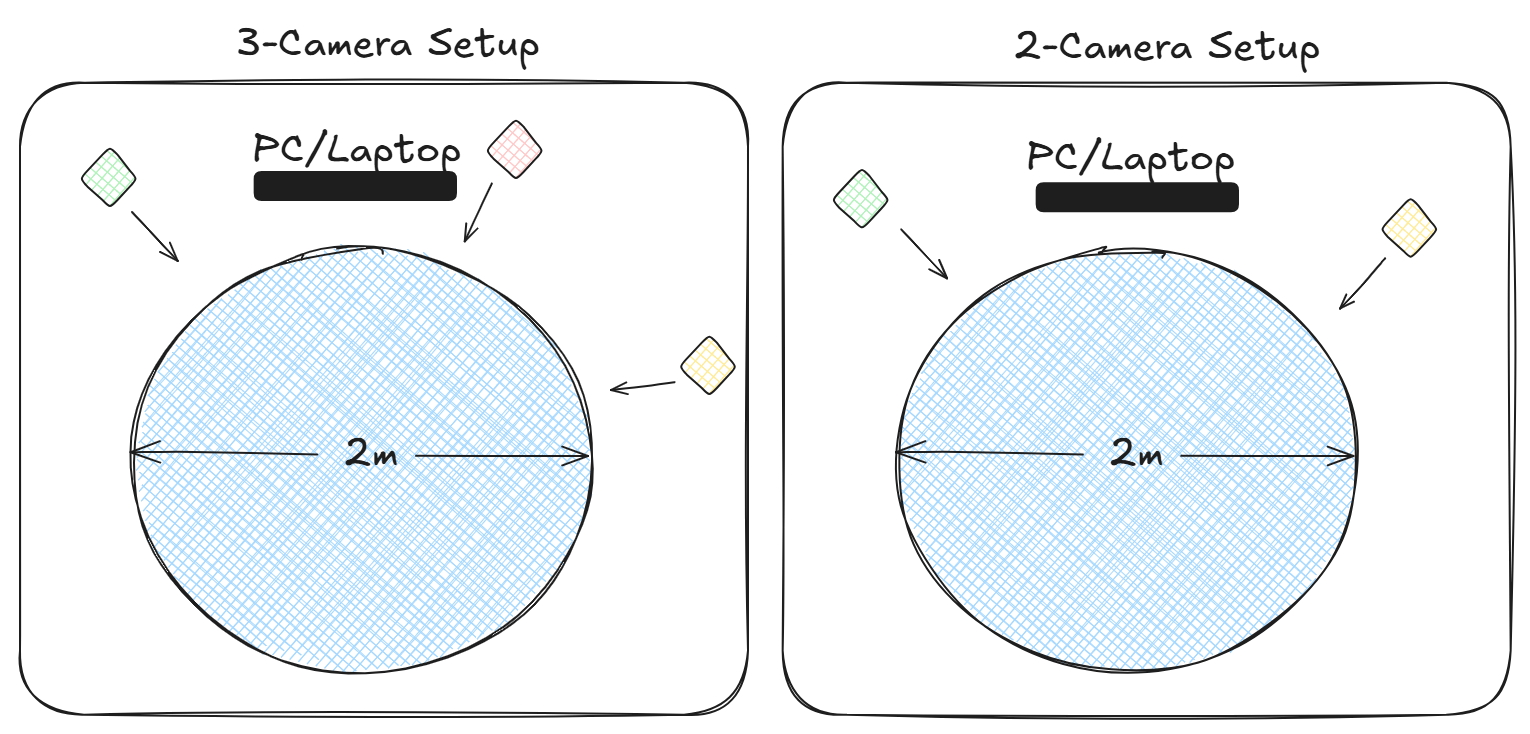
- Camera Orientation: The cameras must face the user horizontally as in the following visual example.